Today we will be using our machine knitting skills to show you how to produce quality good fitting circular socks on a knitting machine! We will be using a Brother KH940 Knitting Machine, with ribber, you may have to experiment with yarns and tensions to get them just right for your machine.
Those familiar with machine knitting, knitting machine patterns and the terms they use, follow the Pattern lines. Otherwise, the Beginner sections are best 🙂 Towards the end, Pattern and Beginner begin to merge, mainly because there is no short way to explain what the steps are and hopefully the leaners are becoming more familliar with the machine knitting process by the end.
The short version as a PDF can be downloaded by right clicking and “Save Target/Link As..” here Machine Knitting a Sock Pattern , other patterns can be found on the Machine Knitting Patterns, Free! page
Yarn: 4 ply (Sock yarn, wool containing some synthetic for better wear)
Tensions (shortened to T for the remainder):
For the 1 x 1 Rib Band ‘0’ (for cast on & circular row)
‘3’ for main rib
‘6’ stocking stitch (st = stitch)
NOTE: Set the tensions on both main carriage and ribber to be the same.
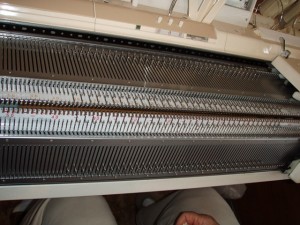
Pattern: With main yarn, T ‘0′ cast on 75 stitches in 1 x 1 rib (zig zag row right to left).
Beginner: Prepare to cast on by moving every second needle to the B position, working from the middle for 75 needles width (do to the 37 mark on the left, and 38 on the right, both beds, the bottom bed will be offset slightly to the left) . Moving the carriage side to side once will line them up nicely, finish with the carriage on your right, reset your row counter to zero.
Now thread the yarn through the carriage, and between the 2 beds, and hold it firmly under the knitting machine beds.
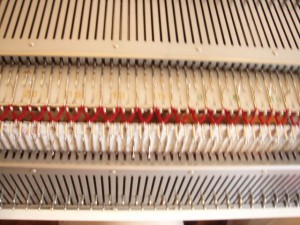
Set the tension to ‘0’ and slide the carriage and ribber left over the needles, this will knit the yarn creating a zig zag row.
NOTE: Put your ribber cast on comb on. Simply remove the fine wire and feed the comb up from under the beds so that the ‘teeth’ seperate each zig zag, then feed the wire back through the weight comb and let it hang. Add 2 weights evenly near the sock.
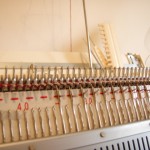
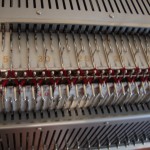
Pattern: Knit ‘1’ circular row.
Beginner: With the carriage still on the left, set the carriage to do a circular row. Press in right hand Part button on main carriage, this means it will only knit from right to left on the main bed. On the ribber, push up the left Part button to P-R, this will only knit from left to right on the ribber bed. Now slide the carriages right, then back to the left. Set counter to zero.
Pattern: Remove circular setting, T ‘3’, knit 33 rows in rib.
Beginner: Remove circular settings on the carriage and ribber by setting it back to normal, change the tension setting on the carriage to ‘3’ and knit to 33 rows.
Pattern: Transfer all stitches to main bed, decrease 7 stitches evenly along bed.
Beginner: Using the double eyed tool, move the stitches from the bottom bed to the main bed, thus creating a whole row. Drop the ribber bed down one notch. Then decrease 7 stitches evenly along bed. See the video below for a demo.
NOTE: This produces a rib at the top of the sock that is better shaped to the body of the sock than if you don’t do this decrease.
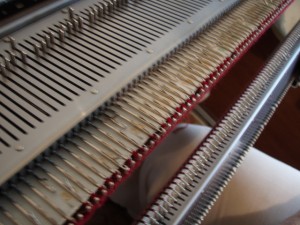
You should end up with something like this.
Pattern: Close gaps keeping centered.
Beginner: Using a transfer tool, move all stitches from each end, towards the middle to close gaps, this is time consuming and fiddly. See below.
Pattern: T ‘6’, knit 1 row in stocking st.
Beginner: Change the tension setting on the carriage to ‘6’ and knit 1 row (right to left) stocking (normal/plain) stitch using the main carriage only.
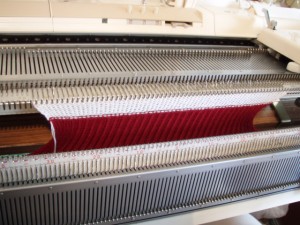
Pattern: Take work off with a few rows of contrasting waste yarn.
Beginner: Break or cut the yarn and replace with waste yarn, using a contrasting colour is highly recommended. Knit a few rows with the waste yarn, 6 to 10 rows will be ample. Break waste yarn and knit until the sock falls off. Remove cast on comb and weights. Leave the carriage on your right.
Pattern: H pitch on ribber, 34 needles on each bed to working position.
Beginner: To the left of the knitting machine bottom bed / ribber, you should see a slider shaped like a smile that has P – H, slide it right to H, this is so that the needles don’t touch each other when protruding. Now bring 34 needles on each bed to working position B.
NOTE: The main bed right most needle must be outside (to the right) of the ribber bed right most needle.
Pattern and Beginner: With the wrong side of the last knitted row facing you, start on the right centre needle and place the left most loop of the sock onto that needle (NOT the waste, fold it under, away from you). Now roll the rib into a circle and place what was the right most loop onto left centre needle and 1 loop onto all remaining needles along the main bed. This should put the center seam of the rib at the back of the sock and on the main bed.
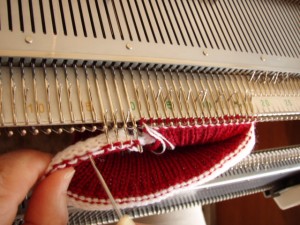
Pattern and Beginner: Now work your way along the bottom bed, 1 loop from the sock (NOT the waste) onto each needle.
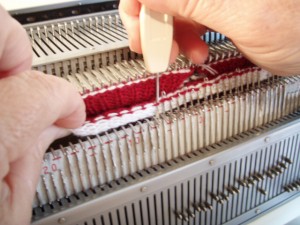
For those only just learning Machine Knitting, maybe this will help.
Pattern: T ‘6’ knit 40 circular rows (80 on row counter) keep downward pressure.
Beginner: Set your tensions to ‘6’, set your row counter to zero. Set your carriages to do a circular row again, if you have forgotten, see just under the casting on instructions, it involves the Part buttons. Thread your main yarn back on, knit 40 circular rows (80 on row counter) keep downward pressure. This will be the length up your leg of the sock.
Machine knitting the sock heel
Pattern and Beginner: Drop the ribber bed half way only, change to main bed only (presser). T ‘5’ on main carriage. Set “holding cam lever” (N-H-I) to (H). Remove the circular knitting setting on the main carriage.
On the top bed, assuming your carriage is on the right, bring the furthest needle from the carriage to holding position (left most needle, all the way out), knit 1 row (from right to left), place yarn under the protruding needle (now closest to carriage), bring furthest needle from carriage (right most) to holding position, knit 1 row, place yarn under right most needle, protrude 2nd left needle, knit 1 row, now place the yarn under the 2nd left needle but over the 1st…
Repeat until there are 8 needles in holding position on each side of the sock. Main bed only!
NOTE: Keep downward pressure on the sock underneath the main bed throughout the knitting of the sock heel as the sock will grow longer under the main bed as the heel takes shape, ribber bed side will not.
Pattern and Beginner: You should have 8 needles out on each side with the carriage on your right, and the yarn under the 8th innermost right needle but over the first 7 needles on the right…
Push the innermost (8th) left needle back to knitting position D. Knit 1 row, place the yarn under the new innermost (7th) left needle but over the remaining 6 left needles. Push the innermost right needle to knitting position D. Knit 1 row.
Place the yarn under the new innermost (7th) right needle but over the remaining 6 right needles. Push the innermost (7th) left needle back to knitting position D. Knit 1 row. Repeat until all needles are in except the rightmost needle the carriage should end up on the left with rightmost needle only remaining out.
Remove presser, replacing with ribber, raise ribber bed to knitting position and set main carriage back to circular knitting.
NOTE: Next row has to be worked on the ribber only, which it should because in circular knitting settings from the above step, moving from left to right only knits on the ribber bed. Make sure the remaining needle in the holding position on the main bed is on the outside of the needles on the ribber bed.
Pattern and Beginner: T ‘6’, knit 1 row (left to right). Place yarn under remaining needle. Set “holding cam lever” (N-H-I) to N and set knitting machine for circular knitting again. Reset counter.
Knit 60 circular rows (120 on row counter). This will be the foot.
Machine knitting the sock toe
Pattern and Beginner: Using a double pointed transfer tool, decrease 1 stitch each end on both beds (pick up 2 stitches, but only move 1 needle space inward, meaning the 2nd last needle has the last stitch on it but the 3rd last has 2 stitches). Knit 2 circular rows (twice back and forth with the carriage, ends on same side). Do this 5 times.
Pattern and Beginner: Using a double pointed transfer tool, decrease 1 stitch each end on both beds again. Knit 1 circular rows (twice back and forth with the carriage, ends on same side). Do this 6 times. Hopefully you have 12 stitches remaining!
Break yarn leaving about 30cm and replace with more waste yarn, knit a few circular rows and break waste, knit until sock falls off!
Grafting the sock toe by hand
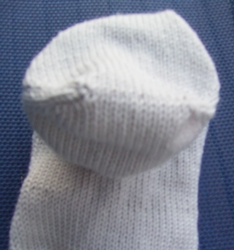
Pattern and Beginner: The video explains it best, its hard to put into words! This grafting method leaves no seam, the most comfortable sock you will ever knit! Grab a needle and thread the 30cm of yarn you had left onto a needle. Poke it through from the outside into the space beside the last knitted stitch, so that it comes out on the inside.
Fold the waste yarn out over the toe to expose the single row of main colour, stitching from inside to outside of the sock (out of stitch), starting with the stitch nearest you and closest to the end you came through on. Another out of stitch through the opposing side of the toe.
In to stitch (from outside to inside) you came out of first (closest to you), then out of stitch in the next one along (2nd closest to you). In to stitch first stitch on opposite side, then out of stitch in the next one along (2nd one opposing side). Repeat this until toe hole is closed! Poke the needle through to the inside of the sock at the end of the last graft.
Remove the waste yarn from the sock toe. Remove waste yarn from rib.
Sew up the rib and end all threads!
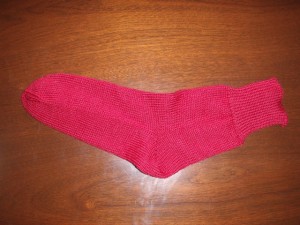 Hooray!
One Sock! Repeat for a 2nd one, or put eyes on the toe for a sock puppet 🙂
You could also try using “Variegated sock yarn” for some fancy coloured socks! Christmas happens every year!
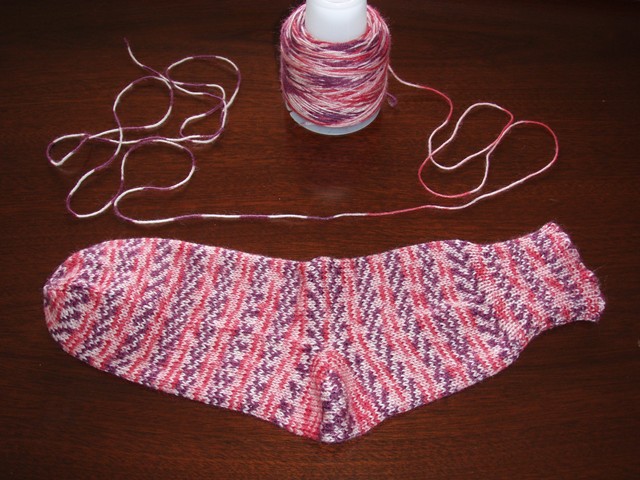
The whole “machine knitting a sock for beginners” process, with me asking questions, taking photos and video, redoing parts that I didn’t understand, and the final hand stitching parts, took a little over an hour. Without me “helping”, I’m sure a pair of machine knitted socks could be produced in this time. The time it took to get all this onto a website, a football team could be wearing new socks… 😛
thank you very much for the video on you tube. thank you too for the excellent camera work, best i’ve seen kat
You are very welcome & thank you for saying so! Also, thanks for being the first to comment on my site! Sorry, you don’t win anything though… 🙂
Fantastic videos! Thank you. I found a similar pattern on the net and have worked through without any video help. To see you doing what I’ve done for some time now is great.
To speed up the heel shaping and avoid wrapping a needle on every row, after the initial first needle wrap, I place a needle into hold on the same side as the carriage to give an automatic wrap.
When moving back out to work, I move 2 needles to work opposite car and one to hold next to carriage and keep repeating until all back into work (again, avoids wrapping and looks exactly the same – just a bit quicker).
Again – many thanks
Mark
Ps – have you tried garter bar turns to start CIR knitting as that is my next task – again to save time running off onto waste and rehanging.
Thanks for really great instructions! I’m new with MK but this was very easy to follow! Thank you again!
Ahh I am aware of this heel method Mark. Each time a step must have been missed and the carriage ended up on the wrong side meaning another row was needed. Practice makes perfect though! I will try to get a video of this method also. Thanks for the tips!
Thank you! I’m sure this video will solve my problems in sock-making.
Thanks a lot! I managed to knit the first socks with your excellent instruction.
You are welcome!
[…] Kolla i korgen! Där ligger inte mindre än FYRA PAR strumpor och väntar på att få tårna stängda. Två par är klara och sitter på fötter:) SÅ himla kul! Nu har jag hittat fram till ett mönster som passar min fot perfekt. Jag har hittat mycket bra hjälp hos Vikatextil, Anna så klart och denna suveräna filminstruktion. […]
Glad to be of service 🙂
I am very happy to have found this site. I am a novice knitter and hope to be able to turn out socks someday soon.
Thank you so much for taking the time to make and upload this fantastic video – so clearly demonstrated. Brilliantly helpful.
sir , iam rajeswararao,from india, if posible send more details for hand kniting wark procedure
Great instructions! I am a total beginner (don’t hand knit, just learning with the machine). My major motivation is to make socks, though hubby will experiment with sweaters once I let him near the machine 🙂 Is there a rule of thumb for knowing how many rows to add per inch/cm for making knee high socks? And do I have to add or reduce to compensate for calf width? Thanks.
Thank you for this tutorial. I have just knitted my first pair of socks. It took me about 4 hours which involved watching the videos a couple of times each! The instructions are excellent.
One thing I changed was instead of breaking off the yarn after the ribbing I just unpicked half a row to the right and then starting knitting again. Saved me another join.
Hi Cheryl,
I knitted a pair of knee highs for my son and admit I just guessed the number of rows and as he isn’t terribly tall they were a little long.
I started with 87 stitches for the rib as I like a firmish rib but then decrease 7 stitches when I put the ribber stitches onto the main bed before knitting the one row stocking stitch on the main bed and then knit 1 row.
If you do not want to have to decrease those 7 stitches you can start with 80 stitches. When I was shown originally they did not do the extra stitches but I like it but it is all up to the individual and once you have done a sock you will find out what suits you.
If I was doing them again I would then put all the stitches on the left side of 0 on hold and take off the stitches on the right of the 0 on a few rows waste yarn and then put them on the left side of 0 on ribber bed so that I could decrease easily for the calf and end up with the 68 stitches, 34 on each bed (for my size) below the calf. Take stitches off hold on main bed.
I would then knit 50 circular rows (100 on row counter), decrease 1 stitch at the very left of knitting one stitch in on both main and ribber beds and move the end stitch in to close gap. Knit 5 circular rows (10 rows on row counter), repeat 5 times to 50 rows on row counter. I would then take it off on a few rows waste and put it back on the machine with the left side (you might have to put a mark) on either side of the 0 on the main bed and then 34 on each bed.
I did it another way and although this way sounds complicated I think it is easier and would do it this way next time. I knitted another 70 circular rows (140 on row counter) making a total of 290 rows on row counter to heel) but as I said it was too long so would cut down on those last 70 circular rows). Do heel and then proceed as for short sock as per video.
Congratulations! I will have to try that, its all about learning new methods 🙂
Hello, (sorry don’t have your name) just to say thank you for the effort you have put into your site and the brilliant instructions given especially for the new machine knitter(me). Can you tell me how to adjust a basic sock – I want to knit some christmas stockings for my grandchildren and am looking for a fiished item about cuff to heel 18″ foot 10″ and then toe -and leg width 8/9″. I experimented with 120 sts cast on (done all on single bed) but was not sure how many sts to put into hold for heel and toe to balance shape. How would I calculate how many shapings to make for heel and toe for the shape I am trying to achieve. Best regards.
Mary
Hi Mary,
I knitted a pair of socks to the knee for someone once and had 124 sts (62 on each bed) and knitted about 140 rows (280 on row counter) from bottom of rib (not counting rib) to heel as he liked to turn down the whole rib. I only held a total of 11 sts on each side of main bed for heel and for toe it did decrease 1 st every 2nd circular row (4 on row counter) 6 times and every circular row (2 on row counter) also 6 times. He had very large legs but not very big feet so when I got to heel I had decreased sts down the leg and only had 90 sts left for foot ie 45 to put on each bed. I took it off on waste yarn and put it on both beds so that the decreases came down the back of the leg when finished. It took a while but he was desperate as no-one else would knit them for him because of the size of his legs so it was a challenge. He only had a small foot but you would need to knit at least 70 + rows (140 + on row counter) for foot.
Sorry I haven’t been much help but good luck and once you have done one the rest will be easy.
great for a danish knitter, i will love to see this every day
You have done a great working.
best greetings.
aase
It’s been 30 years since I’ve used machine knitter and I’ve forgotten even basics. To find your site is such a blessing and I thank you very much for the time and effort. I’ll soon pull out one of my 5 machines (Knitking is my favorite) and go thru the tutorials. Thanks again for giving me hope.
Vielen Dank für Video ! Большое спасибо , очень полезная информация !;))
I am a hand knitter eager to better learn machine knitting. Thank you very much for this great tutorial. I think I am ready to knit my first pair of socks on my Brother knitking 881. Your videos are such a great demonstrating tool to learn the knowhow of knitting socks…
Great work Thank You
Thank you so much for taking the time and effort to make the videos, type up the narrative and post this online for us to learn from. I just bought a K940 with the express purpose of making socks – lots of socks. I have successfully made a pair using your pattern and instructions and was just thrilled with it. Thank you so very much for the details for beginners. It was absolutely what I needed to figure out how to make socks on my machine. I plan on making this my basic go-to sock going forward.
My next steps are to figure out how to make this repeatable for different sized feet, ankles and calves. I’m wondering if you know what the gauge was when you did this. I know it was a few years ago, but I’m hoping you remember or have some notes.
Thanks again!
Thank you. I have been machine knitting for awhile, but never felt confident to try socks on a machine. I did one today using your instructions, and it is FANTASTIC! Yeehah. Thanks heaps.
Hi Debi,
The number of rows for leg length and foot length are fairly easy as you can see how much longer you want them and count the number of rows for say one centimetre etc and remember that it is circular so will need to show double on your row counter. Also wouldn’t make the leg part more than 100 rows on row counter and they tend to fall down unless you do long ones and shape them at the calf which isn’t hard but a little more complicated.
For the width you need to go up or down in multiples of 4 so that the heel and toes are centred. So if they have a fat foot just add 8 and that will give you 2 more either side of the 0 on both beds. You will soon work it out. For the heel 9 each side on hold is not bad for most adult sizes. For a small child I have done 44 sts rib and knitted 35 rows so that it an be turned down and not taken any off when I go into the circular knitting. Knitted about 20 rows circular (40 on row counter), then only 6 sts each side on hold and back again for the heel and then 24 circular rows (48 on row counter) for foot the dec 1 stitch each end on both beds in next and every 2nd circular row 4 times altogether (16 on rc) and then in same way every circular row 3 times (total 22 on rc).
People have asked why I put extra stitches in rib and then decrease them before the circular leg rows but it is because I like a firm rib but not one that is too tight like bought socks have.
Hope this helps. Happy knitting.
lol, Thats great! Hopefully you will make a second one to match 🙂
Thanks so much for these detailed instructions! I made my first sock last night and finally understood how to turn the heel, etc. I really appreciate that you took the time to do this for knitting machine novices, you are awesome!
we love you thank you so much xx
Why thank you!
Happy to help! Hopefully you knit a second one 🙂
Bless you and all like you dear woman (and Mark!!!)
I bought a 910 Brother 11 yrs ago with dreams AND promises of pumping out items to the teens in my family. Took classes but I had SO many problems. My now grown kids and nephews still ask for socks hats and the occasional skirt followed by pats on the head, ie: “It’s OK if you CAN’T/ we love you ANYWAY” cause sadly I’ve rarely produced despite so much time trying.
With your video now…ALL THINGS ARE POSSIBLE! (Pats self on head)
Thank you Admin. I already have questions but I’ve gone on and on here…
Till next time…..
Thank you for your helping us machine knitteres. my brother 940 wont start up, so i Will try your advise on fixing it
Absolutely brilliant. Thank you for taking the time to do this for us beginners!
Can you get quite a dense sock from a double bed machine or do you really need to use a circlular sock machine? I am bookmarking your excellent site as I know I will use it often.
Thank you again!
this is just fantasic,im now ready to take of an do the socks,used to d them long ago,just clden rem,how to start,thanks a millian,imso glade of all this informaton,tomorr ill start ,my socks, thanks again,,
Thank you for the detailed pattern for the machine knit sock. The SunCoast Machine Knitters meet each month – at this month meeting one of our knitters used your pattern to demonstrate how to knit a sock on the double bed machine.
I thought you would like to know how much your pattern is appreciated. . . Marie Holm, SunCoast Machine Knitters, Florida.
I can’t thank you enough for this superb tutorial.
So clear, precise and helpful.
A wonderful reference point.
Thank you for your time and efort.
Thank you very much for the instructions. I found you on a general search “How to make socks on a knitting machine” as I was about to throw away my knitting machine, it having sat unloved for 20 years! Now I’m inspired to dig it out and start again. I cannot hand knit but was always hopeful of machine knitting, so now I’ve actually found something I want to knit, there’s hope. Your presentation is very professional and thorough, inspiring and a good teaching example. Thank you again. This page is going to be both printed out and saved on my toolbar 🙂
Thank you for the instructions and the videos..Much appreciated
Really appreciate this tutorial!!So inspiring…now to pick out the yarn!!
That’s great Marie, thanks! I will pass on your message to the brains behind it. 🙂
Thoughtful and thorough directions. The first pair are done and tomorrow I will make another. Thank you, thank you!
Still going in 2016. What a great tutorial with fantastic videos. I look forward to getting some socks knitted shortly. Even though I use a Lemair Machine the videos really help to put everything in the picture for any knitting machine using the ribber. Thanks again for a wonderful and really useful tutorial.
This tutorial is still a “goldmine” for a new machine knitter – thanks!
Great instructions. Please keep posting stuff!
🙂
Thank you!!!!!! Even if French is my first language, I understood . Thank you for the videos and the explanations!
In 2017 your tutorial is still appreciated. Thank you
Fabulous videos and instructions. I feel I can attempt this now after knitting hundreds of socks by hand all these years!
Thanks you very much!
Thank you for this excellent demonstration. I like hand-knitting socks but until now I have failed with machine knitting them. Your explanation and videos have helped me a lot. Many thanks.