Today we will be using our machine knitting skills to show you how to produce quality good fitting circular socks on a knitting machine! We will be using a Brother KH940 Knitting Machine, with ribber, you may have to experiment with yarns and tensions to get them just right for your machine.
Those familiar with machine knitting, knitting machine patterns and the terms they use, follow the Pattern lines. Otherwise, the Beginner sections are best 🙂 Towards the end, Pattern and Beginner begin to merge, mainly because there is no short way to explain what the steps are and hopefully the leaners are becoming more familliar with the machine knitting process by the end.
The short version as a PDF can be downloaded by right clicking and “Save Target/Link As..” here Machine Knitting a Sock Pattern , other patterns can be found on the Machine Knitting Patterns, Free! page
Yarn: 4 ply (Sock yarn, wool containing some synthetic for better wear)
Tensions (shortened to T for the remainder):
For the 1 x 1 Rib Band ‘0’ (for cast on & circular row)
‘3’ for main rib
‘6’ stocking stitch (st = stitch)
NOTE: Set the tensions on both main carriage and ribber to be the same.
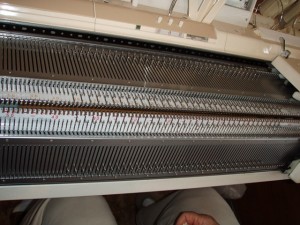
Pattern: With main yarn, T ‘0′ cast on 75 stitches in 1 x 1 rib (zig zag row right to left).
Beginner: Prepare to cast on by moving every second needle to the B position, working from the middle for 75 needles width (do to the 37 mark on the left, and 38 on the right, both beds, the bottom bed will be offset slightly to the left) . Moving the carriage side to side once will line them up nicely, finish with the carriage on your right, reset your row counter to zero.
Now thread the yarn through the carriage, and between the 2 beds, and hold it firmly under the knitting machine beds.
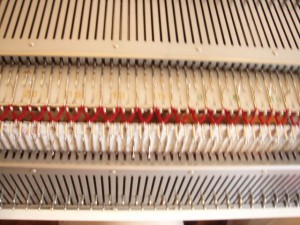
Set the tension to ‘0’ and slide the carriage and ribber left over the needles, this will knit the yarn creating a zig zag row.
NOTE: Put your ribber cast on comb on. Simply remove the fine wire and feed the comb up from under the beds so that the ‘teeth’ seperate each zig zag, then feed the wire back through the weight comb and let it hang. Add 2 weights evenly near the sock.
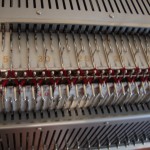
Pattern: Knit ‘1’ circular row.
Beginner: With the carriage still on the left, set the carriage to do a circular row. Press in right hand Part button on main carriage, this means it will only knit from right to left on the main bed. On the ribber, push up the left Part button to P-R, this will only knit from left to right on the ribber bed. Now slide the carriages right, then back to the left. Set counter to zero.
Pattern: Remove circular setting, T ‘3’, knit 33 rows in rib.
Beginner: Remove circular settings on the carriage and ribber by setting it back to normal, change the tension setting on the carriage to ‘3’ and knit to 33 rows.
Pattern: Transfer all stitches to main bed, decrease 7 stitches evenly along bed.
Beginner: Using the double eyed tool, move the stitches from the bottom bed to the main bed, thus creating a whole row. Drop the ribber bed down one notch. Then decrease 7 stitches evenly along bed. See the video below for a demo.
NOTE: This produces a rib at the top of the sock that is better shaped to the body of the sock than if you don’t do this decrease.
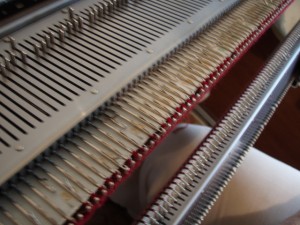
You should end up with something like this.
Pattern: Close gaps keeping centered.
Beginner: Using a transfer tool, move all stitches from each end, towards the middle to close gaps, this is time consuming and fiddly. See below.
Pattern: T ‘6’, knit 1 row in stocking st.
Beginner: Change the tension setting on the carriage to ‘6’ and knit 1 row (right to left) stocking (normal/plain) stitch using the main carriage only.
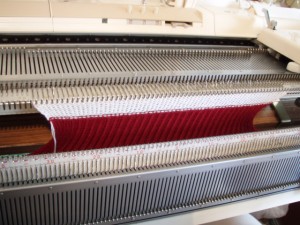
Pattern: Take work off with a few rows of contrasting waste yarn.
Beginner: Break or cut the yarn and replace with waste yarn, using a contrasting colour is highly recommended. Knit a few rows with the waste yarn, 6 to 10 rows will be ample. Break waste yarn and knit until the sock falls off. Remove cast on comb and weights. Leave the carriage on your right.
Pattern: H pitch on ribber, 34 needles on each bed to working position.
Beginner: To the left of the knitting machine bottom bed / ribber, you should see a slider shaped like a smile that has P – H, slide it right to H, this is so that the needles don’t touch each other when protruding. Now bring 34 needles on each bed to working position B.
NOTE: The main bed right most needle must be outside (to the right) of the ribber bed right most needle.
Pattern and Beginner: With the wrong side of the last knitted row facing you, start on the right centre needle and place the left most loop of the sock onto that needle (NOT the waste, fold it under, away from you). Now roll the rib into a circle and place what was the right most loop onto left centre needle and 1 loop onto all remaining needles along the main bed. This should put the center seam of the rib at the back of the sock and on the main bed.
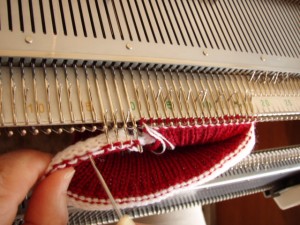
Pattern and Beginner: Now work your way along the bottom bed, 1 loop from the sock (NOT the waste) onto each needle.
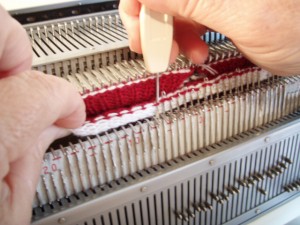
For those only just learning Machine Knitting, maybe this will help.
Pattern: T ‘6’ knit 40 circular rows (80 on row counter) keep downward pressure.
Beginner: Set your tensions to ‘6’, set your row counter to zero. Set your carriages to do a circular row again, if you have forgotten, see just under the casting on instructions, it involves the Part buttons. Thread your main yarn back on, knit 40 circular rows (80 on row counter) keep downward pressure. This will be the length up your leg of the sock.
Machine knitting the sock heel
Pattern and Beginner: Drop the ribber bed half way only, change to main bed only (presser). T ‘5’ on main carriage. Set “holding cam lever” (N-H-I) to (H). Remove the circular knitting setting on the main carriage.
On the top bed, assuming your carriage is on the right, bring the furthest needle from the carriage to holding position (left most needle, all the way out), knit 1 row (from right to left), place yarn under the protruding needle (now closest to carriage), bring furthest needle from carriage (right most) to holding position, knit 1 row, place yarn under right most needle, protrude 2nd left needle, knit 1 row, now place the yarn under the 2nd left needle but over the 1st…
Repeat until there are 8 needles in holding position on each side of the sock. Main bed only!
NOTE: Keep downward pressure on the sock underneath the main bed throughout the knitting of the sock heel as the sock will grow longer under the main bed as the heel takes shape, ribber bed side will not.
Pattern and Beginner: You should have 8 needles out on each side with the carriage on your right, and the yarn under the 8th innermost right needle but over the first 7 needles on the right…
Push the innermost (8th) left needle back to knitting position D. Knit 1 row, place the yarn under the new innermost (7th) left needle but over the remaining 6 left needles. Push the innermost right needle to knitting position D. Knit 1 row.
Place the yarn under the new innermost (7th) right needle but over the remaining 6 right needles. Push the innermost (7th) left needle back to knitting position D. Knit 1 row. Repeat until all needles are in except the rightmost needle the carriage should end up on the left with rightmost needle only remaining out.
Remove presser, replacing with ribber, raise ribber bed to knitting position and set main carriage back to circular knitting.
NOTE: Next row has to be worked on the ribber only, which it should because in circular knitting settings from the above step, moving from left to right only knits on the ribber bed. Make sure the remaining needle in the holding position on the main bed is on the outside of the needles on the ribber bed.
Pattern and Beginner: T ‘6’, knit 1 row (left to right). Place yarn under remaining needle. Set “holding cam lever” (N-H-I) to N and set knitting machine for circular knitting again. Reset counter.
Knit 60 circular rows (120 on row counter). This will be the foot.
Machine knitting the sock toe
Pattern and Beginner: Using a double pointed transfer tool, decrease 1 stitch each end on both beds (pick up 2 stitches, but only move 1 needle space inward, meaning the 2nd last needle has the last stitch on it but the 3rd last has 2 stitches). Knit 2 circular rows (twice back and forth with the carriage, ends on same side). Do this 5 times.
Pattern and Beginner: Using a double pointed transfer tool, decrease 1 stitch each end on both beds again. Knit 1 circular rows (twice back and forth with the carriage, ends on same side). Do this 6 times. Hopefully you have 12 stitches remaining!
Break yarn leaving about 30cm and replace with more waste yarn, knit a few circular rows and break waste, knit until sock falls off!
Grafting the sock toe by hand
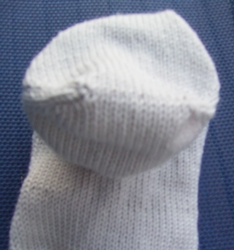
Pattern and Beginner: The video explains it best, its hard to put into words! This grafting method leaves no seam, the most comfortable sock you will ever knit! Grab a needle and thread the 30cm of yarn you had left onto a needle. Poke it through from the outside into the space beside the last knitted stitch, so that it comes out on the inside.
Fold the waste yarn out over the toe to expose the single row of main colour, stitching from inside to outside of the sock (out of stitch), starting with the stitch nearest you and closest to the end you came through on. Another out of stitch through the opposing side of the toe.
In to stitch (from outside to inside) you came out of first (closest to you), then out of stitch in the next one along (2nd closest to you). In to stitch first stitch on opposite side, then out of stitch in the next one along (2nd one opposing side). Repeat this until toe hole is closed! Poke the needle through to the inside of the sock at the end of the last graft.
Remove the waste yarn from the sock toe. Remove waste yarn from rib.
Sew up the rib and end all threads!
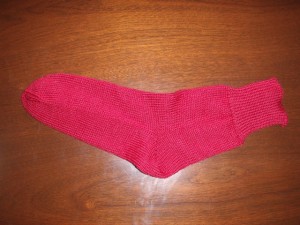 Hooray!
One Sock! Repeat for a 2nd one, or put eyes on the toe for a sock puppet 🙂
You could also try using “Variegated sock yarn” for some fancy coloured socks! Christmas happens every year!
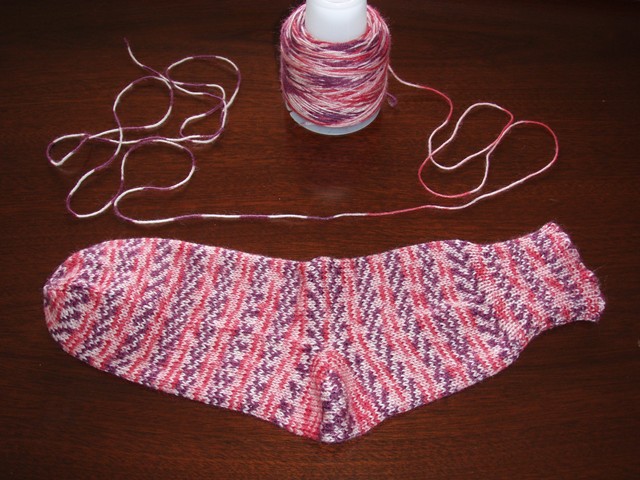
The whole “machine knitting a sock for beginners” process, with me asking questions, taking photos and video, redoing parts that I didn’t understand, and the final hand stitching parts, took a little over an hour. Without me “helping”, I’m sure a pair of machine knitted socks could be produced in this time. The time it took to get all this onto a website, a football team could be wearing new socks… 😛
I’m new to using a ribber, so I really enjoyed following this sock pattern and tutorial. Thank you very much.
I used a 4ply wool/acrylic blend (50/50) that I had knocking about in my yarn stash.
I do have a couple of questions:
1) what size feet do you have? The sock was quite long on the foot and was also very wide! 😉
2) how would one adjust the pattern to short-row shape the toe better, so that the seam for the toe would lie on top of the toes, the way commercially made socks do?
Many thanks and best wishes.
Rich
Hi Rich,
Length of foot and leg are easy as you just knit the number of rows you need for your length.
To make the sock wider or narrower you need to go up or down by multiples of 4 so that you have say one less on either side of the 0 on both top bed and bottom bed. If you don’t need to have a loose rib you could use 65 stitches for rib and decrease only 1 stitch before doing the plain row at the end of the rib. This will give you 32 on main bed and 32 on ribber bed and I would only short row for heel ending up with holding 8 stitches on either end on main bed. If you have a very skinny foot you could do 61 stitches for rib minus 1 stitch leaving 60 stitches for sock itself.
Also I do not have a pattern for the join above the toe like bought socks as I feel that is uncomfortable and I graft the toe at the tip so that there is no seam at all. The whole sock except for the rib and the heel is circular.
The socks in the pattern fit me – I am about a size Aust. 7 which is about Eu 37. Did you knit 60 circular rows which is 120 rows on row counter?
Hope this helps. I love knitting socks as they are small and quick. Happy knitting!